Want to hand out a party favor at your event but you have a lot of guests and need to make sure you don’t go over budget? Here is a perfect solution that can be tailored to any party theme … a drink coaster set! And, you will only spend $2 (or less) per guest.
I will take you step-by-step to create a drink coaster set for each of your guests. If you have more than 100 guests, it would be fun to recruit some helpers and set up an assembly line. Maybe put on some music and turn it into a crafting party – fun, fun!
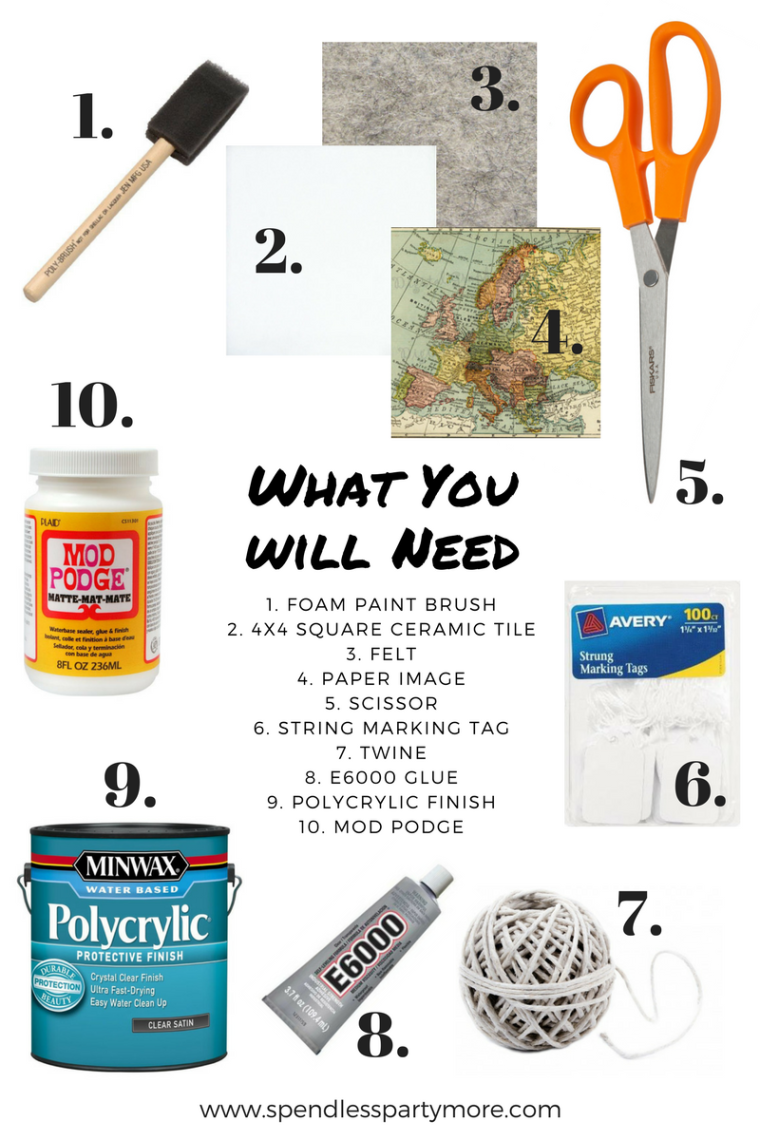
Step 1: Cut out two 4×4-inch felt squares and set them aside.
Step 2: Cut out two 4×4-inch photo images and set them aside.
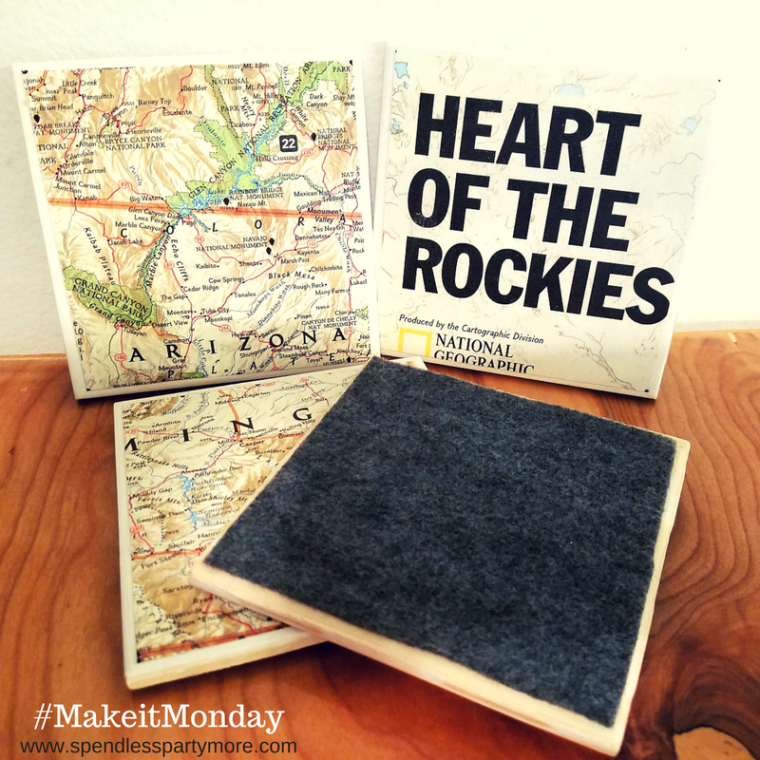
Be creative when selecting your photo images … you can use old maps, scrapbook paper, magazine images, or even print images on regular copy paper.
Step 3: Dip the foam paint brush into the Mod Podge (or watered-down Elmer’s glue) and brush a thin layer of glue on the backside of the photo image.
Step 4: Place the photo image, glue-side down, onto the top surface of the ceramic tile. Make sure the photo image is centered on the tile.
Step 5: Use the foam paint brush to smooth the top of the photo image and remove any air bubbles. Set the tile aside to dry.
Step 6: After both tiles are dry, use a clean foam paint brush to apply a thin coat of the Polycrylic finish onto the surface of the tile. Set the tile aside to dry, for at least 24 hours.
Step 7: Once the clear finish is dry, use the E6000 glue to apply the felt square to the bottom of the tile, and set aside to dry.
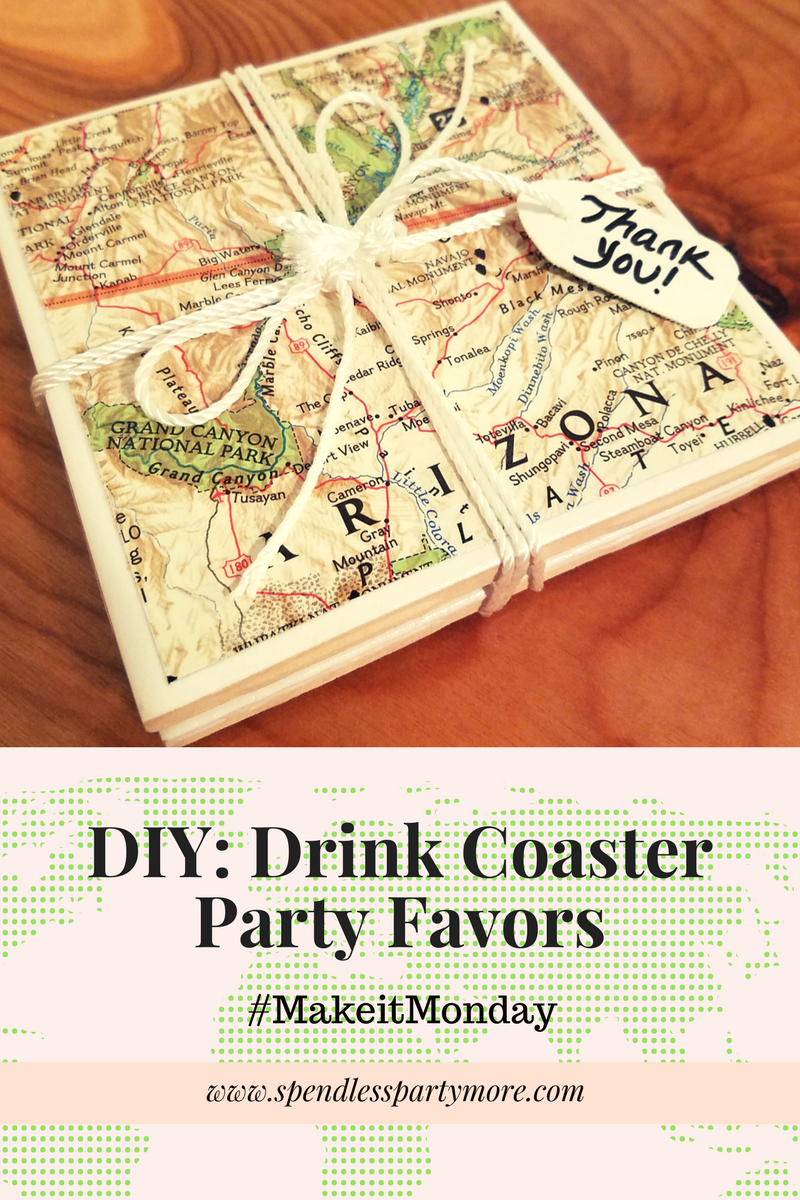
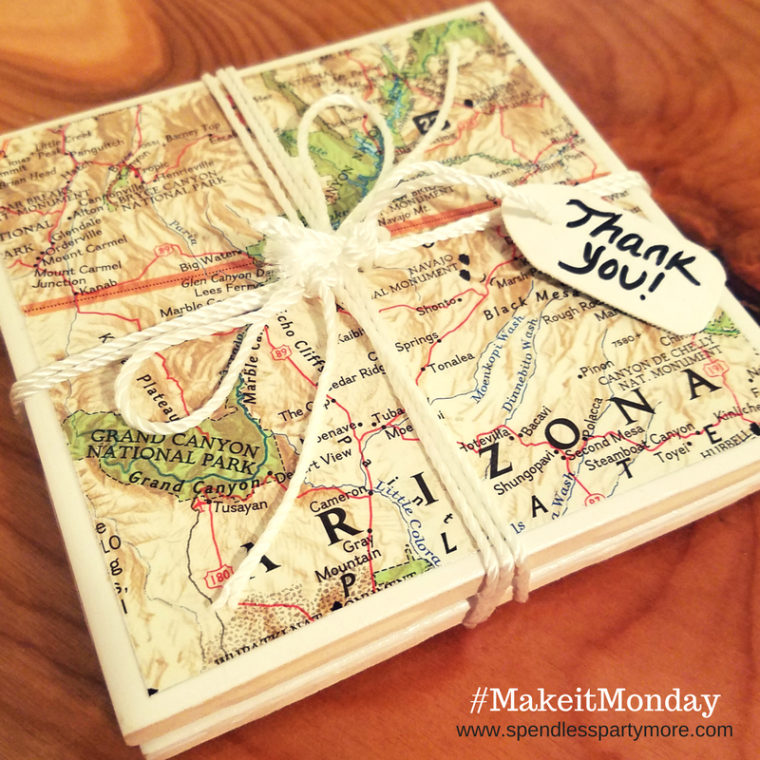
Step 8: Bundle two of the finished tile coasters together with twine (or ribbon).
Step 9: Finish the party favor by handwriting a simple thank you message to a string hanging tag and tie it to the twine.
You’re finished!
Now, you just have to repeat the steps as many times as there are guests. I am certain your family and friends will appreciate the time, effort, and creativity that you put into their gift!
Remember to include your own personality when recreating this project. Choose different colors and images that appeal to you. Play around with different style tags too.
One last tip … earlier I mentioned you can make these coaster sets for less than $2 a piece. There is two ways to accomplish this … 1. Try to get the craft supplies for free from community forums like Craigslist, and 2. Always use coupons offered by your local craft store.
Happy savings … and remember to have fun!

P.S. I used this DIY project as the party favors for my own wedding. Check out my How to Plan a Wedding post for more details.